Showing posts with label footbridge. Show all posts

Saturday, May 3, 2014

Soyokaze Bridge buidling - Phases 01 and 02


As I've said in previous posts, I've finally come up with a reason for the trestle at the front of my layout. And, that lead to another bridge creation - this time for cars and foot traffic.

Naze hashi  
なぜ

(Why Bridge)  :)

I did a series of rough sketches to get the design down. The base of the bridge is foam core with styrene accents and supporting structures.


Additional "cheap" styrofoam was  used as the under support structure.


 I'm going to paint up the area below the bridge to represent a sort of estuary or inlet.


 The design is simple, but I like the feeling - foot traffic on one side and autos on the other.


I did the first round of building, then sprayed the whole bridge with a gray. The arches will be painted in a traditional red.


I also had to do a double check in the space afterwards. After seeing the bridge in place, the bridge seemed a little modern for the space right in front of the Village, however it made sense for the City. I plan to add wood accents to offset the modern look a bit.


As I assembled the bridge, little things started popping up in my head. Items like pedestrian safety and barriers so cars and people wouldn't just...OOPS it off the roadway into the water. hehehehe These details are being addressed as best I can so that I can look at the bridge without being upset about the flaws. :::grin:::: I'm adding more and more of these safeguards - Phase 02.


 Phase 03 is just another level of details and painting. Photos will follow, of course.

Comments welcome!


Wednesday, September 25, 2013

Soyokaze River Shelf Layout: Sept 25th Update

Faked in backdrop. I'm going to print something as a backdrop to the shelf that's very close to this.


Well, things are rolling right along on the Soyokaze River Shelf Layout. I'm excited about the progress. I've gone through with multiple scenic passes, dolled some items up and have laid in two rounds of people and scenes - my favorite part of this. After taking a look at these photos, it became clear that I need to roll through one more time with some major touch up work. The camera is BRUTAL when you get down deep and start taking close ups. I want to hit small areas like building foundations and "dust off" streets and the like.

I also noticed that I have some "leaners" here and there - people that didn't quite make it vertical in the scene. I need to roll through and fix that. I used a new cement for the people and the results were better than I've gotten in the past from standard white glue or plastic cement, so I'm happy about that. I recommend it. Duco Cement. It's like Super Glue, but it's a little thicker and I found it to be much easier to work with. (Even fixed a broken vase top that my Mother had)


I plan to hit the plants and trees with scenic cement after everything is where I want it. I have not used it yet, so I'm planning on testing it out on my old Soyokaze layout first to make sure I'm using it properly.


Then, another detail pass on buildings, water, people and roads. I'll put in some lines and rooftop variation here and there. I think that will be the final step. We'll see once I'm done. Another week or so for sure.


This has been a grand process for me and I've added some new skills to my virtual toolbox which is always good. I'm pacing myself and accepting the time that is available to me instead of whining about not having time to work on hobby stuff.

An oldie but goodie from an old Landmark Forum class I took at one point: It's not that you don't HAVE time to do the things you want, it's that you are not MAKING time to do them. If you really break things down and look at them earnestly, you'll see that in most cases this is correct. Watching TV? That is potential hobby time. You're just choosing to watch TV instead of doing hobby items. Which is FINE, by the way. It's just more "empowering" if you say that YOU are the one doing it, it's not being done to you. Anyway....


Looking at this small layout shelf, I can see how a full layout - about 11 times the size of this shelf in my case - can take a long while to "complete". I have trains running, so it'll be an ok wait! :)

More photos can be found here:  
http://www.flickr.com/photos/malcojojo/sets/72157635552874482/

Cheers!


Talk about work plans or lunch plans? :)

Grandmothers brag about their grandchildren   :)

Pedestrians and vehicles share the road. The road is not open to all through traffic.


Things tend to move a little slower up in the Soyokaze River area.

Poets, lovers and tourists love the Soyokaze River Bridge


Monday, August 6, 2012

Soyokaze Harbor Update

Soyokaze Harbor Update: The Devil's in the Details


I've been working on going slower with things and really thinking through some of the workings of Soyokaze Harbor. How things run, who's there and what's around it and why. It's been an interesting process for sure.

As I write this, I have some traditional Japanese music playing in my headphones - about as close as I can get to being Japanese. hehehe  And, that's the rub - for a lot of this, I'm just going on what I see in photos and what I like personally. It dawned on me while trying to work out the details that this really is just a "fremo", fun set of modules for me. Not being Japanese is one thing, but having never been to Japan is another. I'm winging this and am in NO way trying to pass this off as textbook Japan. :)

That being said, I'm enjoying the Soyokaze building immensely and seem to be able to work on it without the same, frantic, "I need to get this done" pace that I had with the Station module. This is a good thing. Again, looking at some more traditional styles of Japanese ways, a slower and calmer pacing seems to be not only good for me, but good for the modules as well. What's the rush?

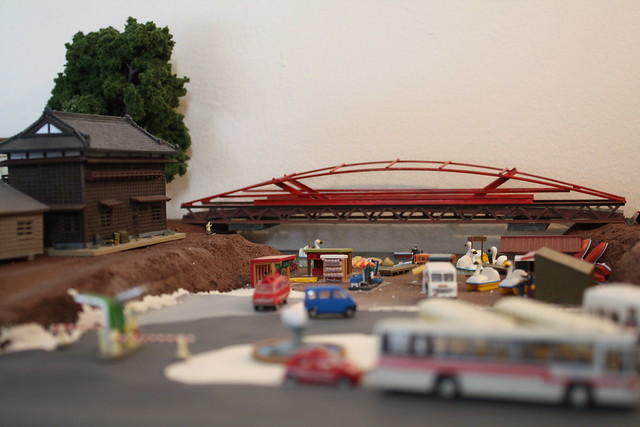
I've come up with a very basic "story" for Soyokaze that involves this harbor scene. Soyokaze is more than just a temple tourist spot. It's also a place to get some of the freshest fish in the area. It rolls from the sea to your plate and is prepared by some of the most expert hands in the region. It's a taste treat that people flock to the area for. And, it's dolphin and shark friendly - another massive plus for their tourism.

The harbor itself is small, but their fishery is a machine that churns out fish for Soyokaze and some of the surrounding areas - Shizuka primarily. It's kept up properly, however it's connection to the building on the hillside is not. The tunnel and stairs that used to connect the harbor building area to the hillside building area are disused and run down.  People still use the stairs from time to time, but the tunnel is avoided at all costs for both physical and spiritual safety.  Why? That's another story. :)  I used styrene for the stairs and will post a proper, in focus photo of them at a later date.


The grey area will be painted out and detailed up with foliage


The overlook has been made safer with the addition of another railing making accidental falls less likely. They also provide a little privacy for lovers looking for a little get away of their own.


Additional moss and details will be added to this lover scene :)


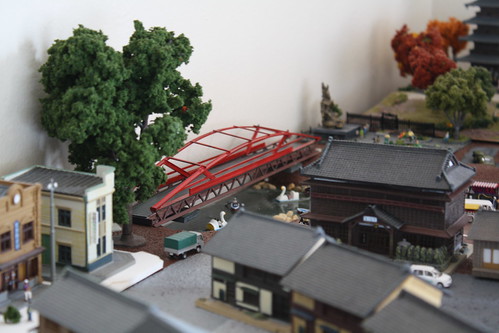
The sea wall has been braced with additional pylons. The natural curve of the harbor prevents waves from getting too wild, but the extra precautions have come in handy on several occasions. In the final module in the Layout Of The Future, Soyokaze will be higher up and the harbor down lower to make it more tsunami safe and hilltop based.


My first pass at dock safety painting of the ramp and stairs made me see that "winging it" isn't the way to go. I'm going to go back and tame the painting down - maybe sticking with just yellow. I'll sit with it a moment to see how things come together.

Too much color? I might shift things to basic yellow and loose the red.


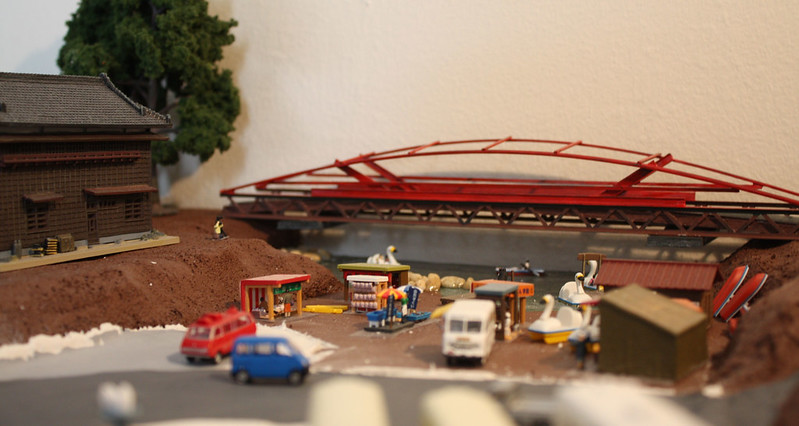
The flat areas on the hillside and waterside are now showing some variation. I added some foam to them to break up the flatness and splashed it with a little base brown. I'll go in and paint them up and add some foliage.

The final version of the rocks will most likely be rock grey. Currently looking for Japanese reference.


All in all, I love how this is working out visually and process wise. I'm managing to slow my pace and I'm enjoying the project much more because of it.


Additional details added slowly. I love the man fishing on the dock!


Tuesday, July 31, 2012

Soyokaze Harbor overlook, stairs and ramp

I thought it might be a nice touch to add in a little overlook into the Soyokaze Harbor scene. Maybe something that is officially not for use, but that everyone uses anyway. There are always those places here in the States, so I'm making the assumption that human nature drives people to go to places they are not supposed to go to in Japan as well. :)


I started by doing a simple measurement of the space I needed to cover. Then I did some really basic designing of the look of the bridge itself.


I kept the style simple, unlike the other bridge I built recently. It's a simple platform with raised side walls. I used the I-beam styrene parts I had left over from my other bridge project.

I painted and weathered the overlook a bit, keeping it a simple brown. I might have some moss or moss-like painting on the bridge, too. I just need to find some reference material in the massive list of images I've gathered about Japan, it's coasts and it's structures. I think this will be a fun little addition once the details get placed. I plan to have a little kissing couple on the overlook. Ah, the romance! :)

I built stairs and a ramp for the main building as well. I had to drop the dock area down to make it work with the water level, so I needed to build stairs and a ramp so people could access the area. I think I may re-do the stairs - making them larger so they are easier to access.


<><>

Monday, June 18, 2012

Soyokaze Bridge - Painted!


The big Soyokaze Bridge paint up is DONE! Whoo hoo! :)

I was slightly scared to go in and paint this. I didn't want to have to go back in and RE-paint it if I messed it up. However, I thought it through, planned it out and went into it calmly and slowly. That really helped. I didn't have grand lighting for the photos, but you get the point. :)

Figure 01
 I had painted the main structure of the bridge brown as a base, leaving the walkway bare styrene. I thought about keeping the brown for the whole of the bridge, but thought that it would fade the bridge back and into the scene too much. So, I decided to go with the traditional, Japanese red look for the bridge.
I started with a base of an almost "salmon" red. I wanted to get something that would make the red pop more than the brown would have as a base. (Figure 01)
Figure 02
 Figure 02 shows the Model Master Clear Red  I used for the popping red color. I had it left over from my 1/6th scale figure building days and it worked like a charm, giving me the popping, bright red I really wanted. The clears are an interesting way to add color to things. I recommend experimentation with them if you're using acrylic paints. They give some cool looks. 
Figure 03
 I went in and hit the walkway area with a grey stone with some green in it. I'll end up going in for touch ups on the whole bridge for areas that need some more attention. It's hard to see in these photos, but I also did a dark green trim in the area just under the bottom red area. A thin line of green that I've seen in many of the reference photos I've collected.
Figure 04

I weathered the whole bridge up a bit as well, adding some grime and drip areas and making sure there was some wear on the edges and the like. (Figures 03 & 04)

The Soyokaze Bridge will go over the lake area. I had thought about putting in pillars to support the bridge, but I'm going to use styrene to create support struts that will build into the gray block seen in Figure 04. they will drop into the hillside. I think this will add to the overall look and feel of the bridge curves.

I'll post photos of the paint bridge in place.

<><>

Thursday, June 14, 2012

Soyokaze Bridge

The bridge in place.


After popping a figure on, I see that I need another railing. :) I can't wait to start painting this up!

Wednesday, June 13, 2012

Soyokaze: Bridge Building


I started building the SOYOKAZE FOOT BRIDGE last night. I had purchased the materials and drawn up a plan of action a while back, but I didn't want to start because starting the project meant that there was a possibility of failure. :) I finally just dove in and put it together and I'm rather happy with the results.

The plan was based on the classic, Japanese curved bridge design. Curves and arches. Drawing it up was easy after looking at a few examples online. The hard part was looking at the scene, then putting the bridge together in my mind to match it. Honestly, it's a little more modern that I originally thought it would be, but I thought that I would craft a story and a paint job that might mask that a bit, sticking with a weathered wood feel rather than a metal.

The building itself was easy with the plan in mind. The main bridge is foam core. I sliced one side of the board at one inch sections, then curved it. This is a classic trick with foam board. The sides and arches are styrene. I love working with this material. I use the hobby glue that melts plastic (Model Master Liquid Cement) and the styrene goes together with ease.


However, this doesn't work with the foam core, so I'm trying out a product called Aleene's Clear Gel Tacky Glue and I'm pleased with it so far. While it's not super quick dry and set like melting the styrene is with the other glue, it seems to create a great bond between parts with very little showing when done. (If you're being clean about it! :)  )

Another thing I was making sure I thought through was real world walking over this bridge. It's so high and so long that I needed to put in some side rails so my little, N-scale folks don't fall to their deaths while sightseeing!  I may add some additional safety features later, but the scale offers some slippage here. I could just SAY that there are small rails present that you just can not see due to their size. We'll see.

I've set down a bit of "TILE" styrene for the actual walking area. I'll paint that to look like stone.

The arches will be painted in the weathered wood style and I'll use a fine pen to make it look like they were built with several curved wood pieces to try to get more of a natural feel to the whole of it.

My wife pointed out that this is not like me - building something from scratch at this level. But, seeing the masterful work of this artist really inspired me.

http://n-rail.blogspot.com/2012/01/greenmax-tram-car-layout.html

Watching him measure and cut to create something that was truly unique and new was very cool. I am going to add to the Soyokaze module with little buildings and small items I build myself following his lead. I think this will add to the custom feeling of Soyokaze along with adding hours to the hobby time needed to complete it.