Showing posts with label temple. Show all posts

Monday, September 18, 2017

The slow burn of layout creation continues


The busy Dad got a little time to play around with the layout this weekend. This time I focused on the Harbor and Temple hillsides and the tram loop. Yes, the tram loop finally got some love! :)

VIDEO


So, I wanted a little more height to the temple hill. Nothing TOO crazy, but a little more. I wanted to get some more area for trees and the like, so I'm going to do away with the parking area and have the whole hill be the temple space. There will be a parking area at the base and people will be able to walk up a ramp or switchback path to get to the temple.


The overall height is where I want it now. I just need to get things level and even before I lock it down and plaster.  I also want to make sure my little elevator idea is going to work in the space. (Mentioned at the bottom of this post...  http://n-rail.blogspot.com/2017/08/another-layout-revamp-again-for-better.html )


I'm also not 100% on the water area in the harbor. I might break out my boats to make sure that there is room if I make the water portion smaller. I don't want things to be cluttered and I liked the way the fishing boats looked in the previous version. We'll see.


 I'm also looking forward to trying my Photoshop background project. Before I work with the plaster and all, I'd dial in the background, replacing the blue that I have up now with a planned and finessed Photoshop created background. This background would be tuned to line up with the areas that are currently on my layout. Roads, the ocean, fields and trees would line up with the modules and a nice, faded back view of distant mountains will be seen. I'll do the same thing in the Shizuka city section. Seeing as I do motion graphics and design for a living, I'm hoping that I'll be able to pull things together! hehehehe  The size is going to be interesting at 12 feet, but I am going to see if I can work in sections. I also need to check on printing costs.


And finally, I went back to a longer tram loop that will go through the whole of Soyokaze Old Town and Soyokaze Village. I think this will add a little more visual interest when the buildings are flowed back into the scene - the tram passing between and behind buildings as is makes its way. 


Again, not rushing is both challenging and rewarding. I'm just making sure I continue to more forward. For a minute there, I was going so slow that I was actually stopped. I would stand and stare at the layout and just be baffled about what to do next, so I'd end up just walking away. It seems like things are at a slow and steady pace now.

I need to make sure the track is level and make sure I take the time needed to clean up the mess left from the previous layout before moving ahead. While some areas will be fine, others need to be scraped and cleaned before I can re-work the scenery and track. This is proving to be a pain - the glue I used is REALLY good...and not coming off very well. hehehehe  Live and learn.

Planning where things are going is going to be a biggie as well. I need to see where roads will go, where buildings may be, and how the whole of them interact with the track. All of which I love doing! :) 

Thanks for reading!

<><>


Thursday, November 17, 2016

Of Ghosts and Paper Buildings


The Devil's in the Details


I finally got around to making my Soyokaze Temple Ghost! It was an interesting process.

My original idea was to use hot glue and create a figure from it to make a see-thru character. That was proving to be somewhat pointless in N scale.

First, I glued a simple Kato figure to a piece of plastic.


Then, I had a plan to use some green, hobby putty to craft a flowing dress, but the putty I had had dried out. heh So, rather than wait another week or four for a time I could make it out to get more putty, I tried white glue.


So, I gave the plastic from my fake water a try, but...that didn't work 100% either. It wasn't easy to work with the plastic before it cooled. However, it got a little detail into the dress.


I hit the whole of it with white paint and made sure I did a little wisp of white on the plastic. I wanted to make it look like she was leaving a trail behind her.


I painted in some flowing black hair to complete the JU-ON style look and feel of the figure. :)


I glued the plastic into a heavy base on plastic so I could move her around for various photo-ops. It worked like a charm. Especially looking at the rocks as the poor ghost's last resting place in the lore of my layout space.


And, it looks right in place! I'm really happy with the way it turned out overall.


I managed to build another Sankei kit. More complex than the last kit I built and a little more tricky. It was a fun kit. The Sankei kits are a ton of fun to build. 


I love this stairway detail!

 I wasn't sure where to place the finished building. I'm still playing with the placement.

Not a bad spot, but I'm not thrilled with it.

A much more interesting location.
The layout is coming along.

Some folks have asked about the layouts pace and the size. I basically have two sections going.

Soyokaze is about 12 feet by 4 feet.


The Kiwamura and Shizuka sections are about 9 feet by 6 feet. A doughnut, if you will. :)


Thanks for reading! :)


Friday, May 16, 2014

May 2014 Video Update Tour


I have a little video tour update up and I like the progress I'm making on the layout. It's fun to see it come together like it has with all the little items being done here and there.

I still have a long way to go, of course, but it's a fun and relaxing process - as it should be. I've waited a long while to have something like this going and I appreciate the whole of the process, not just getting it done. It can be a little overwhelming at times, but that's when you need to slow it down and remember that it's for fun...and it's not a race.

I also appreciate my wife understanding that the hobby isn't just a silly thing I like doing. She may not understand the why behind what I'm doing, but she knows I like it and that it makes me happy, so she supports me in my endeavors. Very cool Lady. :)

On deck:
• BACKDROP BACKGROUND! Man, I hate seeing that wood paneling in these shots! :)
• Lighting
• A skirt for around the edge of the layout
• Lock down track and scene locations (I'm still thinking about alternate track routes here and there)
• Lay in roadways and building base areas

As usual, comments are welcome.


Wednesday, February 19, 2014

Temple Hill Progress


Well, I was rolling on Temple Hill for a minute, but forward progress has stopped for the time being. I might get going again this week.

I had the base down and, after fixing the damage done by using the wrong adhesive on the foam and having some of it eaten away :::grin::: , I got to work on the build up and hill creation.


I went with the sculpting plaster option. It seemed like the right stuff for this part of the project. I had used other plasters in the past, but this was a lot more fun to work with.


It basically ends up like oatmeal paste - rough and gritty, but easy to lay down and build up when mixed properly. Mixing more was easy as well. There wasn't much I needed to work out there.


After I got that set in place, I started sculpting stairs and ramps with clay. I had some left over from my shelf layout project and thought it might do the trick for the roadway ramp and ramps up the hillside to the various levels of temple hill. I'm sure there are other ways to do this, but I went with this before and it seemed to work out, so I went with the option again.


The hardest thing about this for me was getting the slope of the roadway correct and working out the scale of the steps in areas were people would be walking. I think I got close and whatever isn't working can be re-done and reset with the use of paint or scenic materials. (Yes, I've done that before as well!)

I painted the areas where dirt and foliage were going to be placed to get my base "dirt" color. I'll go over the whole of it with scenic material and the like, but I had to get rid of the pink color. This is standard stuff, but it's always one of those steps I see left out from time to time and I thought it was worth mentioning.


I've had some folks ping me who are "flying under the radar" in model rail circles. The stay silent and tinker with their projects and don't put themselves out there for fear of being snickered at by the more "professional" hobby folks.  I say, put yourself out there! I do it. I am FAR from pro and hack/slash my way through many projects and have fun doing it. The best part about doing is learning from what you've actually done - making note of what worked and did not work for future reference.

So, as I continue to stumble through, I have a lot of fun seeing things progress. The next big thing to get through is getting some layers going on my layout. Raised layers for certain areas. I just need to work out the base structure for it to achieve the look I want.


Kobe, Japan


Monday, January 20, 2014

January 2014 Video Update: Temple and Village


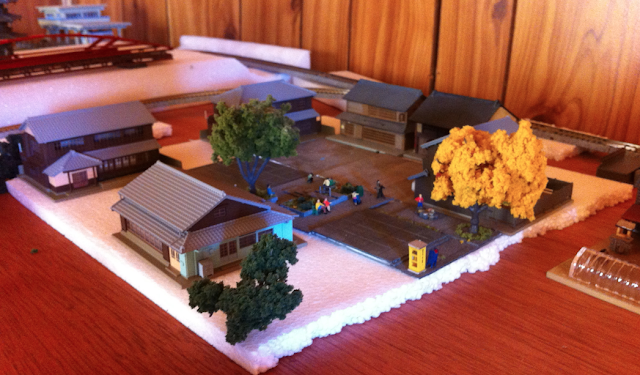
Note: Photosynth did it's best with this image, but failed in several spots  :)


Well, I'm posting this video because it was already done, but yesterday I ended up changing the whole village area around. I'll post photo updates at a later date.

These videos were fun to produce, though I rushed them a bit. (...as usual)  Busy busy most of the time, so I fit things like this in where I can. :::grin::: 

I like having the back area open so I can get behind the layout. I found myself wanting to have all the buildings facing out and into the room, then realized that having some facing back towards the wall will open things up for additional photo opportunities. I can't wait to get the background in so I can stop seeing that wood panel nightmare behind my scenes! :)

As usual, comments are welcome.


NRAIL Jan 2014 Update: Temple and Village from Malcolm Johnson on Vimeo.


Friday, September 20, 2013

Layout progress photos

Photo update of my shelf layout. The Soyokaze Harbor area, Soyokaze and Shizuka.
I have everything roughed in and I'm happy with the overall flow of it.