
I managed to finish the Sankei building the other day. Whew! a challenge for sure. However, I think it turned out well for a first effort. The right tools, patience and attention to details are key to building these paper kits.
I'm starting to develop ways I can work in other parts of the house proper so I don't need to work away from my wife at night. She had some freelance work to take on, so i set up shop in the living room. I'd like to get a tabletop and craft a HOBBY TOP to use in these situations with places for tools, lights, paints and other items that I can pull out for this sort of work. For now, the table my Father-in-Law built is working well! :)

With the main building done, I moved on to the details and smaller parts that come with the kit. The small standup signs were first. And these things were TINY! The parts were connected at the top and bottom and were easy to remove with the ever present sharp, new blade.

There were three parts to the base - again, to build up the height and give more substance to the board. All the signs for the kit are printed right on the instructions, so they needed to be cut free and glued. The glue application is one of the harder parts for me. The toothpick is rather good for getting a small amount of glue where it needs to be. Paper towel got most of the excess off.

Again, the paper is tough to work with when it comes to the glue. The tooth makes the glue set rapidly, so you don't have a lot of "wiggle room" after the parts are together. You can see that they are off slightly on the bases. In time, I think I'll be able to work with these parts to get them to line up better. Still, this will only be apparent when seeing them at this macro level.

The side sign turned out well....


The small doorway section on the roof was rather complex for such a small detail. Layers were built up to give it more depth. The ever present weights are present to keep the parts from bowing and bending. VERY important with these, I've found. You need to keep the walls flat with a little weight. Another good reason to use small amounts of glue.

Glue glue glue - small amounts go a long way with these kits.

Vending machines and bins were also included with the set. I was a bit bummed here. I assumed that these would be slam-dunk builds and that combined with me being tired got me a little sloppy on this step. You can see some misalignment and sad edges here and there. It still reads well on the final product.

My wife took some snaps of me building as well. :) Funny to see what I look like doing this small work. She said the look of concentration on my face is fun to observe. hehehehe I've always had this "feature" - this laser focus that's come in handy for many things in my life including a brief period of time when working at home involved being on a small, IKEA table in the living room while my pregnant wife and toddler moved around me during the day. LASER focus. :)


And then....like that...it was done. I remember looking at it that night and sighing before putting everything away. I was happy I took the building on, but wasn't super happy with the execution. There were areas that were just sloppy and...bush league. It reminded me of models I used to put together as a teenager - ok, but flawed in ways that stood out painfully for me.
I decided to put it all aside and look at it again in the light of day.
I was a bit happier when I took it outside to shoot it.


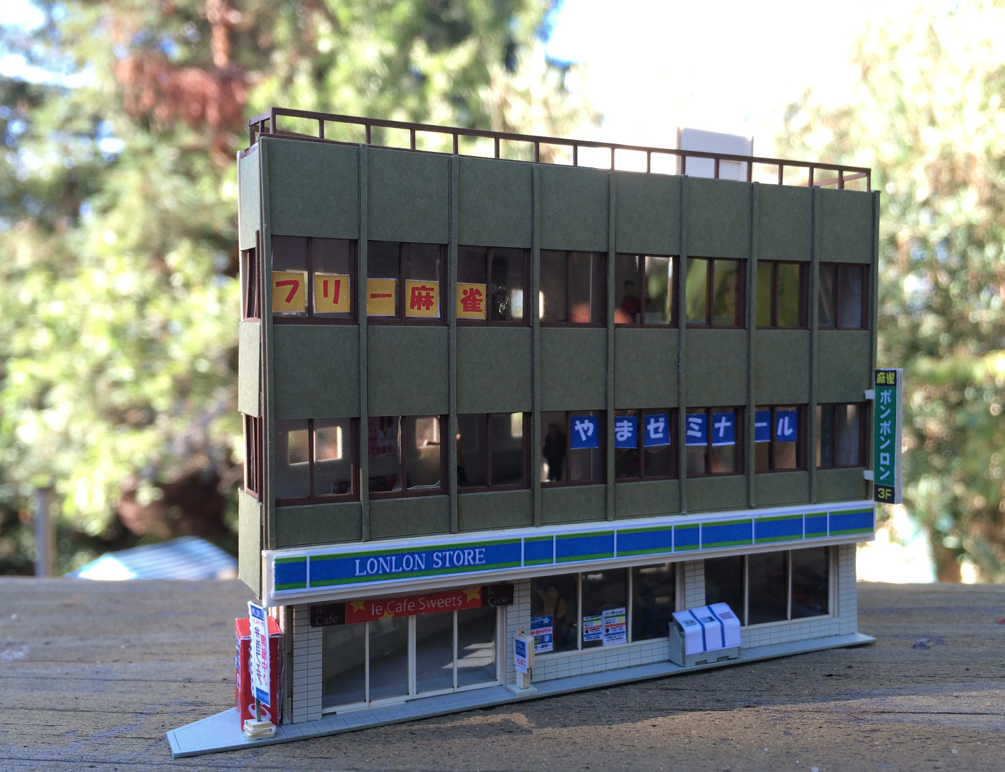

I liked it even more when I had it on the layout. It's not it's final spot - there will be yet another re-org coming soon, but seeing it in place had me wanting to get a few more unique bits of architecture on the layout to match what is commonly seen in the "prototype" areas of Japan. It really adds a lot of interest.


I have some work around ideas for some of the spots, but the experience was a real eye-opener for me. The take away is something that has come up time and time again for me while working in the hobby: Slow down, Malcolm. Slow....down. :)
If I took a bit more time here - even one additional work session, I could have avoided some simple mistakes that would have improved the quality of the finished product greatly. Cutting out the signs REALLY could improve. I noticed things in the final that had me scratching my head and saying, "Really? Did I REALLY just...MISS that bit of white on that sign that could have been removed with ease?"
However, I'm remaining positive and not beating myself up over it. ((However, if I don't learn from this experience and improve, I'll start the self flagellation post-haste!!!!)) :)
I'm going to do the aforementioned SHIZUKA re-org, then do another HOBBY SEARCH SANKEI buy. On deck at the moment.....


I'm not planning on snagging ALL of these items, but I will most likely pick up two more buildings and some additional detail items like those cool scooters and bikes and the photo booth - staples of Japanese culture! :)
For now, I have a few more small detail items from Sankei to put together.
Thanks for reading!
~M~
Nice job!!! I have many small thing with Sankei, Motor Bike, Bicycle, Flags, Air Con....etc They are really great, give a lot of detail to the layout!!
ReplyDelete