A fantastic little Lionel train movie from back in the day. The first train I had was a Lionel. I played with it ALL the time.

Thursday, March 31, 2011
Wednesday, March 30, 2011
Train Operations with sound
Fun set with sounds playing at all the right times.
Obviously this person takes their train ops very seriously! :) I dig it.
Obviously this person takes their train ops very seriously! :) I dig it.
Tuesday, March 29, 2011
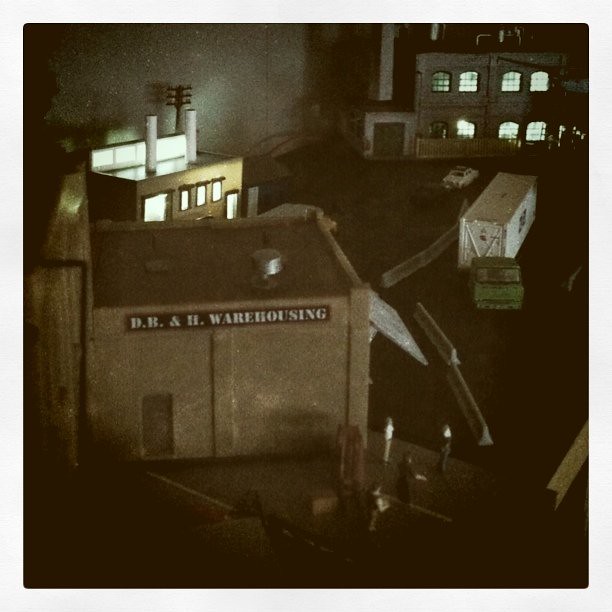
Buildings at the Bend

FLICKR Set - http://www.flickr.com/photos/malcojojo/sets/72157626379292516/
This was a little project I had to split my factory and older business areas apart. The factory area was getting cluttered, so I thought I'd split a few of the buildings off and get a few more to build things up a bit. The result was a fun little foam core base project with some roadway and people to build out a scene where an older area of town was being brought up to speed and redone.
I used foam core alone for the base of the scene and painted over the top with a black/gray for street. I set up how I wanted the buildings to be set before painting so I could work the paint to show the roadway and parking areas.
Woodland Scenics figures toil on the roof and street for added fun. A fantastic fit when combined with their "Road Crew Details" set. I plan to go back in on this to add some additional details and to weather it up a bit more. I have to make these projects last longer - I'm currently running out of space and need to make these projects stretch out for as long as they can. :)


Monday, March 28, 2011
Snap-On Tool drawer N-scale layout!
Awesome! This really has me thinking about layouts and layout locations!
I thought I could get one of these and drop a few layouts into it. heheheh

No...I'm serious. :)
SNAP-ON tool drawer layout
I thought I could get one of these and drop a few layouts into it. heheheh

No...I'm serious. :)
SNAP-ON tool drawer layout
Wednesday, March 23, 2011
N Scale Work Setup
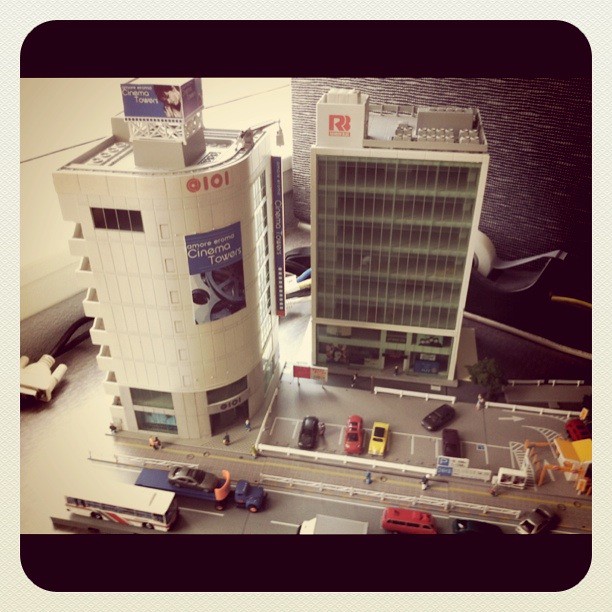
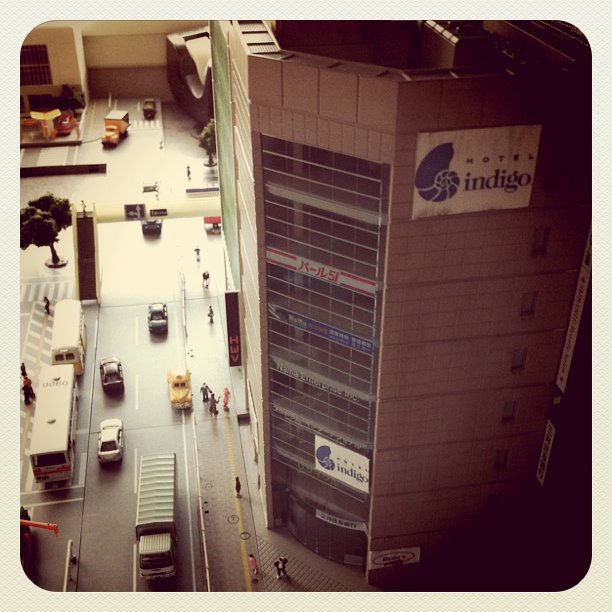
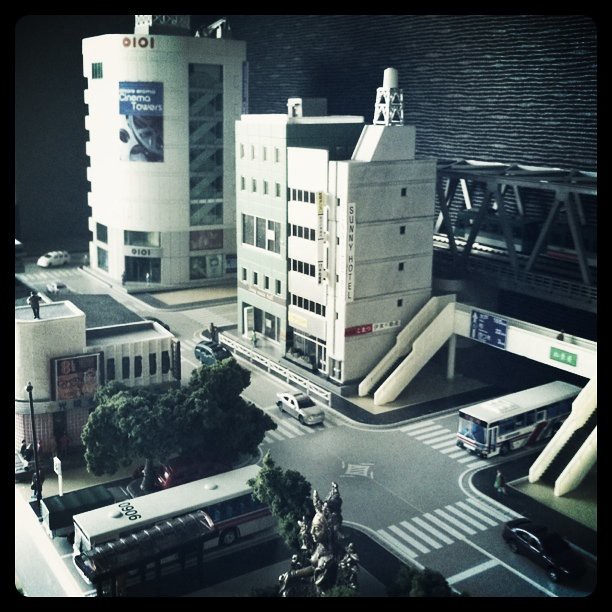
One of the things that keeps me rolling through my work weeks (they seem to go on....and on....and on....) is my N Scale setup. While I wish I had the space for it at home and in one setup, it's grand to have the space at work to port this stuff over.
My home Unitram set grew into a monster right out of the gate. Once I pulled the trigger on an N scale set, I went a little (a LOT) buy crazy and got a bunch of buildings and the like for the Unitram base set. I had a mix of old and new buildings and it was just...strange. So, when my daughter was born, I split up the set into several districts or areas. In my minds eye, it's all part of the same town area, but split out into different physical locations.
I have Old Town Briddon, The Briddon Industrial Park, The Downs (coming soon!) and Downtown Briddon.
The Downtown Briddon section is at work and tucked into two sections in a cubby space and a corner of my desk space. It works out REALLY well due to the nature of my job. I'm Creative Manager and am involved in many processes that require waiting. (Renders....client phone calls where I'm only needed for a portion of the call, etc) This allows for glances over to the set and absent minded repositioning of items in and around it.
What I once saw as a bad thing (having to move part of my set out of the apartment) turned out to be a fantastic addition to my work space. And, one day, it will all come back together into one set with KATO track making connections to all the different areas! Exciting! :)
You can find more shots here:
http://www.flickr.com/photos/malcojojo/sets/72157626200891263/
Tuesday, March 8, 2011

Monday, March 7, 2011
MICRO / SMALL LAYOUTS
MICRO/SMALL Layouts for Model Railroads Site
http://www.carendt.com/
Sadly, the creator of this website passed away recently. The site is perfect for people with small layouts on their mind.
They have a great gallery section as well: http://www.carendt.com/microplans/index.html


http://www.carendt.com/
Sadly, the creator of this website passed away recently. The site is perfect for people with small layouts on their mind.
They have a great gallery section as well: http://www.carendt.com/microplans/index.html


Friday, March 4, 2011
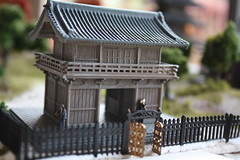
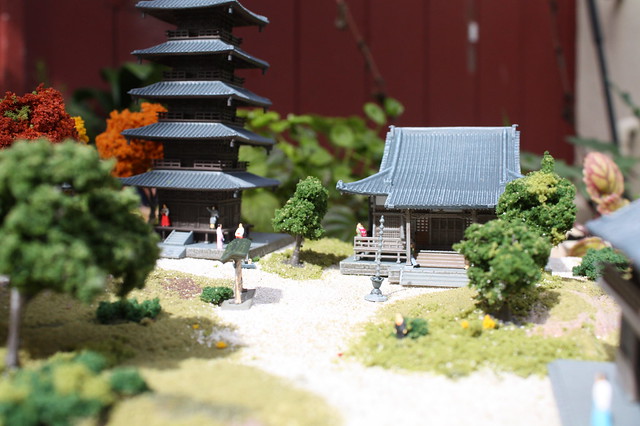
Temple: Base Phase Two
This was a lot of fun! The ideas for the creation of the Temple base were rolling through my head over and over again, but I found it difficult to actually pull the trigger and DO it. I kept thinking that I would mess things up. However, I finally realized that it wouldn't be a big deal if I did happen to mess this stage up - I could just get more materials and try again. So....
First, I drew out the pathways and blocked out the areas I wanted the buildings to be placed.

I roughed in areas that were going to be exposed dirt based on the elevation and space and painted them up with "dirt colors". I had planned on going back in on these areas later, but it turned out that the first pass was fine. I painted in tacky hobby glue and laid the ballast out for the pathways. This worked out, but it was a messy process and I'm sure there were better ways to execute on it. The glue itself was ok, but the top layers of sand were loose and the glue was hard to see on the white, so there were areas I had to go back in on later with more glue and ballast. Messy process.

Next, more glue and mess! :)
I went in over the painted areas and hit them with more glue and turf. Again - I'm sure there was a better way to make this work. Maybe a final spray fix layer over the whole of it? I'll have to look that up. (( COMMENTS WELCOME! )) The turf layers were placed in based on what I thought a real world situation would have. The turf was maintained by grounds people, so it wasn't going to be overrun. However, there were also elements of nature I tried to capture like rough patches and the like.

The last steps were larger green patches, bushes and trees. I wanted a maintained look, but didn't want it to be a bore. I think the right balance was struck.

I do think some sort of topcoat would help keep things in line and together. Another point I had was dust. How the hell am i supposed to keep this dust free??? heheheh A topcoat spray would allow a light feather dusting from time to time. I think this will live with me a while, then be "transformed" into something else at a later date. All in all, it was fun to work on and shoot.
Make sure you see the TEMPLE PROJECT: Complete! post!
Feel free to comment.
Subscribe to:
Posts (Atom)