Wednesday, November 23, 2016

Taking a look back at my layout


While I have a TON of "real world" things to be thankful for this week, I also have some fun, train related items to be very thankful for. To finally have all my various N scale cities in one location is really an amazing thing for me. I was talking about it for ages and now it's a reality.

The start of the whole of it was a simple Kato Unitram set. I still remember when it came in and I got to set it up. I had two drawers in my bedroom and the set fit on top perfectly.

July 3, 2010 - the first time running the Unitram


I ended up going a bit crazy in the purchasing department. Have a bit of a "go for it" ok from my wife was great, but I started purchasing items without planning it out first and ended up running out of space rapidly.


I ended up splitting my set up, taking the Unitram stuff off to work and keeping my older style Soyokaze stuff at home on my dressers. This worked well - I got to have a trail presence at work which helped when the calls got boring. It was great being able to break up the work day by running trams around at work.

The Soyokaze set at home was fun as well.  We lived in San Francisco in a small, two bedroom apartment and space was tight. I used a hard packed white foam for the base and sculpted it by pressing it and compressing it down into roadway ramps and the like - all on a plywood base I could move upstairs and down to work on.

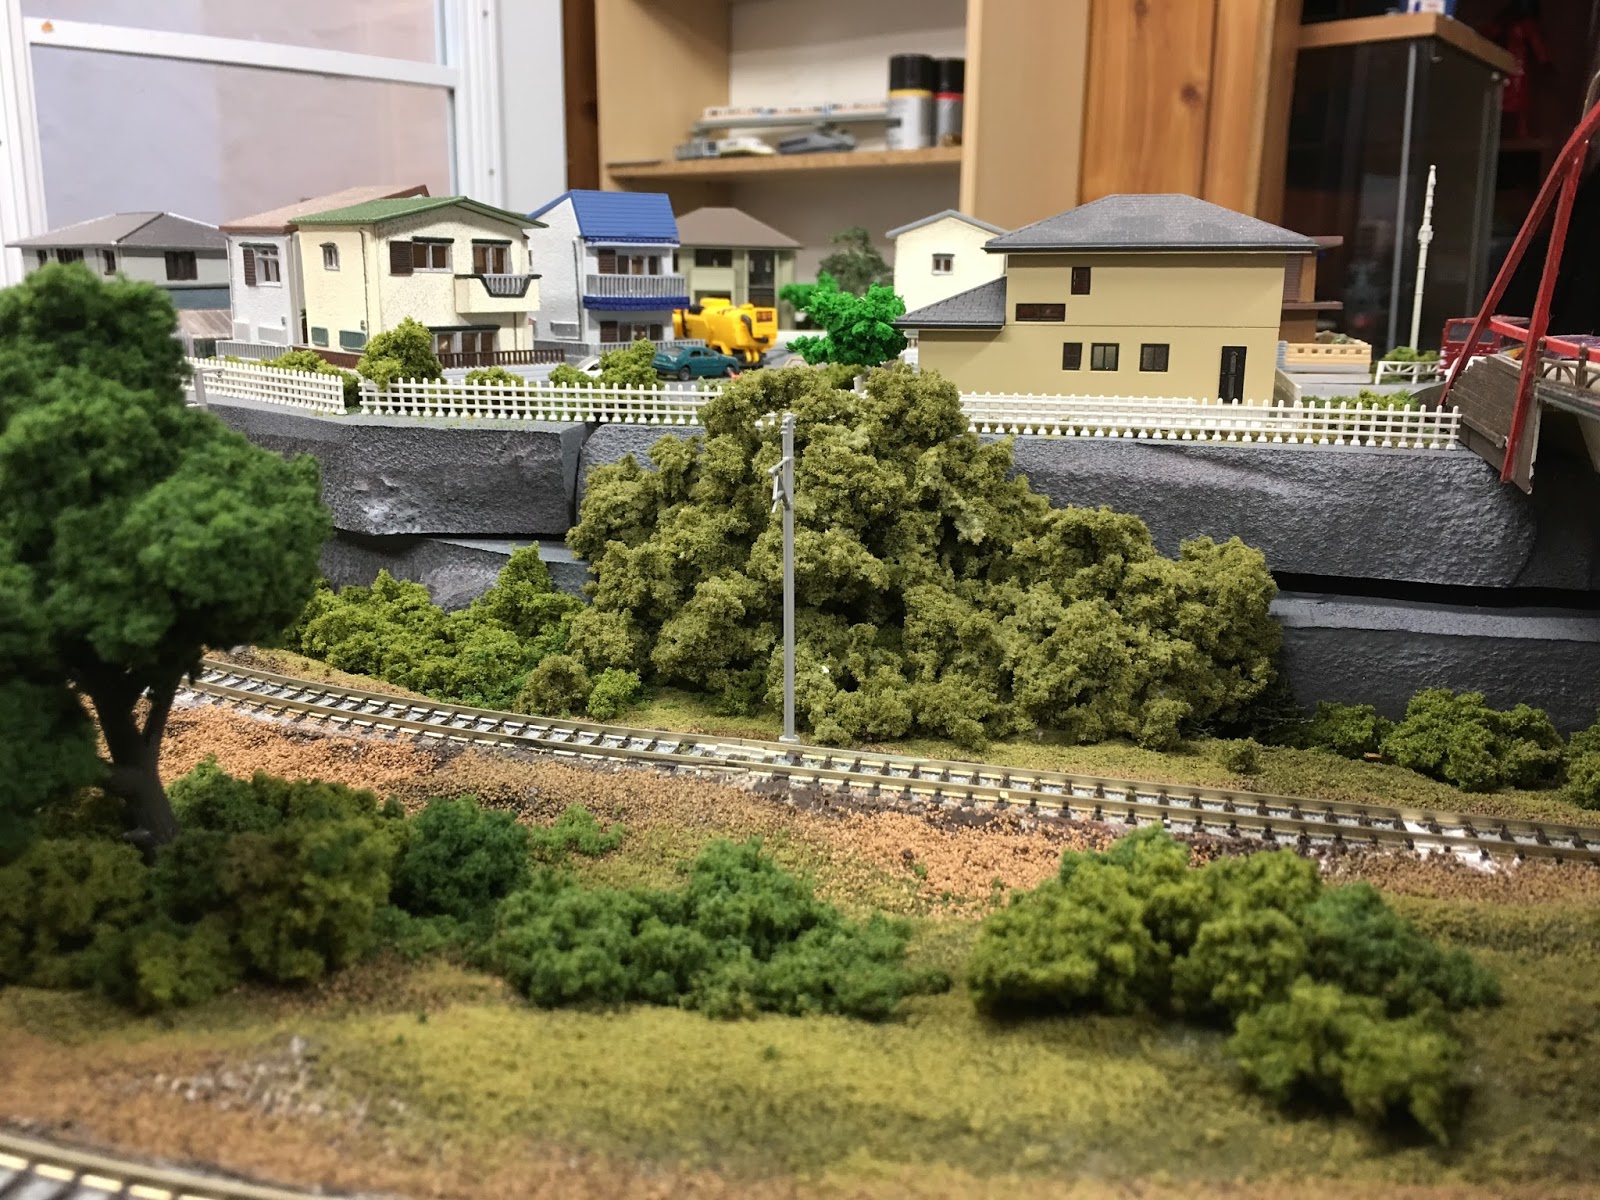
After the buildings were set in place, I was able to drill through the wood and use the Tomytec sand alone lighting pack to light the buildings. Worked like a charm. A few layers of paint and Woodland Scenics scenery materials and things were looking good.


I used the same plywood base trick for my harbor area. This allowed me to move it around easily if I wanted to be downstairs to hang with my wife while I worked.


The two sections went together and provided a rather seamless experience.


The train station area was done in the same way.


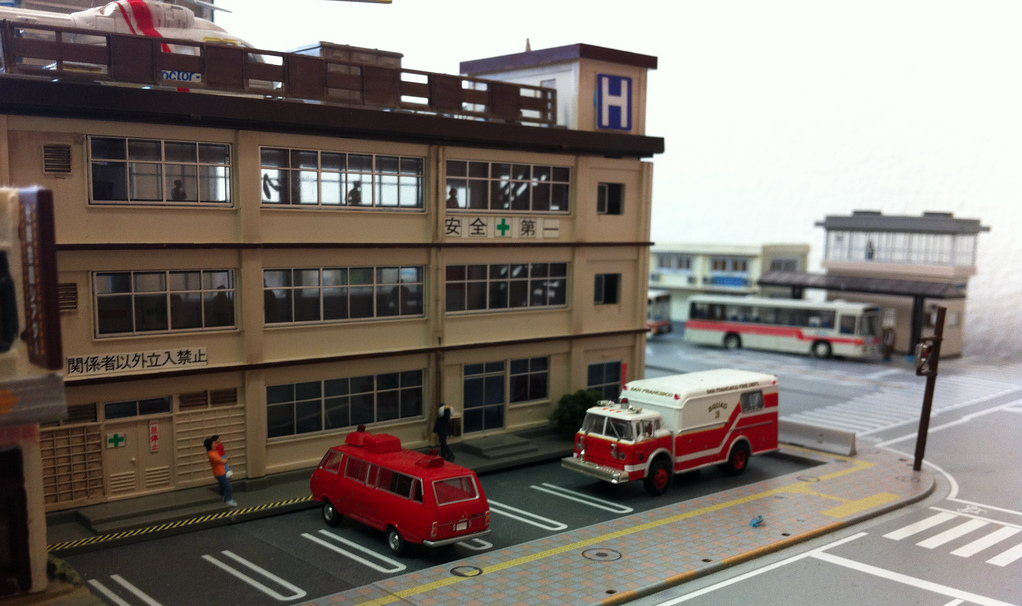
KATO UNITRAM WORK LAYOUT

This was the fun little Unitram layout I moved to work. A ton of fun that kept evolving with each passing day. I'd move stuff around from time to time as a break from work. 
 
Feb 9th, 2012 - Work layout


I'd bring buildings home, detail them and people the insides, then I'd bring he completed building back to work and place them on the layout.  It worked well, but there would be times where I'd have time to work on things suddenly, but I wouldn't have the building home to work on.


Shortly after all of this was coming together, I discovered MODEL RAIL RADIO - a fantastic, interactive model railroad podcast. The show runner - Tom Barbalet - was super friendly and made the experience of being on a live recorded podcast a breeze.

Here's the link to the first show I was on. (Around the 2 hour 49 min mark)
http://www.modelrailradio.com/archive.html#44

And now....this....


I've managed to have a lot of fun in this hobby. For that, I'm eternally thankful.

HAPPY THANKSGIVING!

Friday, November 18, 2016

November iPhone Video Update


Another quick iPhone video of the November progress on the layout. More little moments of hobby time. :)


Thursday, November 17, 2016

Of Ghosts and Paper Buildings


The Devil's in the Details


I finally got around to making my Soyokaze Temple Ghost! It was an interesting process.

My original idea was to use hot glue and create a figure from it to make a see-thru character. That was proving to be somewhat pointless in N scale.

First, I glued a simple Kato figure to a piece of plastic.


Then, I had a plan to use some green, hobby putty to craft a flowing dress, but the putty I had had dried out. heh So, rather than wait another week or four for a time I could make it out to get more putty, I tried white glue.


So, I gave the plastic from my fake water a try, but...that didn't work 100% either. It wasn't easy to work with the plastic before it cooled. However, it got a little detail into the dress.


I hit the whole of it with white paint and made sure I did a little wisp of white on the plastic. I wanted to make it look like she was leaving a trail behind her.


I painted in some flowing black hair to complete the JU-ON style look and feel of the figure. :)


I glued the plastic into a heavy base on plastic so I could move her around for various photo-ops. It worked like a charm. Especially looking at the rocks as the poor ghost's last resting place in the lore of my layout space.


And, it looks right in place! I'm really happy with the way it turned out overall.


I managed to build another Sankei kit. More complex than the last kit I built and a little more tricky. It was a fun kit. The Sankei kits are a ton of fun to build. 


I love this stairway detail!

 I wasn't sure where to place the finished building. I'm still playing with the placement.

Not a bad spot, but I'm not thrilled with it.

A much more interesting location.
The layout is coming along.

Some folks have asked about the layouts pace and the size. I basically have two sections going.

Soyokaze is about 12 feet by 4 feet.


The Kiwamura and Shizuka sections are about 9 feet by 6 feet. A doughnut, if you will. :)


Thanks for reading! :)


Sankei Kit Building: Advances in the Hobby


I keep making small strides in paper kit learning. Little things are making these Sankei model kits much easier to put together. The basics are all the same - sharp knife, the right glue (ROKET Card Glue, in this case), and space to spread out a bit and make sure all the parts are in order.


Keeping the glue lighter when applying it and trying to put it on the inside of the building more than on the outside to avoid the shine the Roket glue leaves on the paper is a biggie as well.


Testing parts and how they go together is a MAJOR piece of this puzzle. Huge. The Roket glue is super fast - you don't want to be saying, "Oops!" and trying to pull parts apart with this stuff.


This was a little thing that made another big difference. The card is thick and when you cut out the roof pieces, you get a very white edge. It's blinding. I was putting them on, then trying to color the edge to kill off the white, but I found that it's WAY easier to hit it with a marker BEFORE gluing it! hehehehe  It's the little things.


I love the rooftop details Sankei kits give. Very dimensional and rich. They also include other details like brickwork and the like which really helps to sell it.


Topping the whole of it off with signage details - provided by Sankei, and other details that I've saved over the years helps to make the model pop.


I need to hit the top left corner on the sign with a knife! :)


And, once in place, the Sankei kits play nicely with other kits - even the plastic kits. The Sankei offerings are fantastic. If you have not tried them before, you might want to give them a shot!

Dibs and Dabs of Items


I've spent a little time on some detail items on the layout. Little things here and there that I've had on my list. Ideal for lunchtime mini-projects.

I've continued adding foliage. It's making a world of difference for me on my layout. 


I also added a few more little detail items here and there. Like this fence section. I plan on adding a lot more.


Some power poles from Tomytec.


I did a small water pour, finally. It was difficult - I didn't really set aside a space for water. However, there were some natural spots that were natural water location spots.


Another Tomytec item went in - a small bridge. Again, it was a natural spot for it. I'm looking at it as a creek area that's dry in the summer, but flowing in the winter.


A Tori Gate went in in Soyokaze Temple.


There are so many more details that need to go in. I have a running list. It's fun adding the smaller stuff. I really enjoy the smaller detail items and stories. It's going to be years of these mini-projects and I'm really looking forward to it. :)