Friday, September 28, 2012

Bay Area Layout Tour: Seth Neumann


MODEL RAIL RADIO (modelrailradio.com/) host Tom Barbalet recently scheduled a layout tour of several fantastic layouts here in the Bay Area. There was a special guest visiting from Australia and Tom took the opportunity to arrange the tour so he could see several spots on his trip.


This video features the layout of Seth Neumann and his lovely, California layout.

See photos from Seth's here:
http://www.flickr.com/photos/malcojojo/sets/72157631645955626/

Model Rail Radio Layout Tour: Seth Neumann from Malcolm Johnson on Vimeo.

.

About MODEL RAIL RADIO
Model Rail Radio consistently provides the best model railroading content. It is a show without advertisers or sponsors where the listeners create the content: a simple formula that has seen the show grow rapidly into the Number One model rail podcast in terms of listeners (69,000+ and rising), hours of content produced per month (9 hours plus) and numbers of guests on the show (typically 15 or more).
It is an open format where anyone can participate. The big names in model railroading call in to talk to regular folks and people who are quickly emerging as new greats in the hobby.

Bay Area Layout Tour: David Parks


MODEL RAIL RADIO (modelrailradio.com/) host Tom Barbalet recently scheduled a layout tour of several fantastic layouts here in the Bay Area. There was a special guest visiting from Australia and Tom took the opportunity to arrange the tour so he could see several spots on his trip.


This video features the layout of David Parks - Cumberland West.

See photos from David's here:
http://www.flickr.com/photos/malcojojo/sets/72157631646076647/

Model Rail Radio Layout Tour: David Parks from Malcolm Johnson on Vimeo.


About MODEL RAIL RADIO
Model Rail Radio consistently provides the best model railroading content. It is a show without advertisers or sponsors where the listeners create the content: a simple formula that has seen the show grow rapidly into the Number One model rail podcast in terms of listeners (69,000+ and rising), hours of content produced per month (9 hours plus) and numbers of guests on the show (typically 15 or more).
It is an open format where anyone can participate. The big names in model railroading call in to talk to regular folks and people who are quickly emerging as new greats in the hobby.

Bay Area Layout Tour: Rick Fortin


MODEL RAIL RADIO (modelrailradio.com/) host Tom Barbalet recently scheduled a layout tour of several fantastic layouts here in the Bay Area. There was a special guest visiting from Australia and Tom took the opportunity to arrange the tour so he could see several spots on his trip.


This video features the layout of Rick Fortin in his grand, serpentine layout area.

See photos from Rick's here:
http://www.flickr.com/photos/malcojojo/sets/72157631646074889/

Model Rail Radio Layout Tour: Rick Fortin from Malcolm Johnson on Vimeo.

About MODEL RAIL RADIO
Model Rail Radio consistently provides the best model railroading content. It is a show without advertisers or sponsors where the listeners create the content: a simple formula that has seen the show grow rapidly into the Number One model rail podcast in terms of listeners (69,000+ and rising), hours of content produced per month (9 hours plus) and numbers of guests on the show (typically 15 or more).
It is an open format where anyone can participate. The big names in model railroading call in to talk to regular folks and people who are quickly emerging as new greats in the hobby.

Thursday, September 27, 2012

Bay Area Layout Tour: Ted Stephens


MODEL RAIL RADIO (modelrailradio.com/) host Tom Barbalet recently scheduled a layout tour of several fantastic layouts here in the Bay Area. There was a special guest visiting from Australia and Tom took the opportunity to arrange the tour so he could see several spots on his trip.


This video features the layout of Ted Stephens in the back room of his office space.

See photos from Ted's here:
http://www.flickr.com/photos/malcojojo/sets/72157631645948366/


Model Rail Radio Layout Tour: Ted Stephens from Malcolm Johnson on Vimeo.

About MODEL RAIL RADIO
Model Rail Radio consistently provides the best model railroading content. It is a show without advertisers or sponsors where the listeners create the content: a simple formula that has seen the show grow rapidly into the Number One model rail podcast in terms of listeners (69,000+ and rising), hours of content produced per month (9 hours plus) and numbers of guests on the show (typically 15 or more).
It is an open format where anyone can participate. The big names in model railroading call in to talk to regular folks and people who are quickly emerging as new greats in the hobby.

Friday, September 14, 2012

Shizuka - The New Arrangement


http://www.flickr.com/photos/malcojojo/sets/72157631531285780/

I switched up the Shizuka layout, taking it from the standard square the the batwing design I spoke to in my last post. While I lost a little bit of space, I gained much more interest in the overall scene. The track is no longer an oval. It winds through the cityscape and has a fun flow. From a visual standpoint, it offers a little more to shoot photo-wise and gives many more chances for little scenic touches. 


Of course, this new situation makes me long for the day I can actually get a full layout going. The track leading off has my mind spinning on the scenic route it can take to connect up with Soyokaze and just how cool it will be to have everything running, lit and together. One day.


For now, I'll take what I can get.

I like the look of this setup, like what it offers in the way of projects and it makes a LOVELY distraction from work from time to time. :)

There are little things with it that worked out really well. The whole back-story of Soyokaze providing seafood to Shizuka and having Drake's Seafood (no, not a Japanese name - Drake is my son heheh) as part of the scene really worked out well. I plan to pepper little things like that through both the Shizuka  and Soyokaze layouts.

The blank spaces that the batwing left MAY be filled in with foam core. We'll see. 

Comments welcome.

<><>

Tuesday, September 11, 2012

The Shizuka Switch Up

I was looking at an old photo of my Shizuka office layout area and something stuck me - I was bored by the concept of it already. I have my space set up again in my new office and thought that I was going to jump in and start rolling with it right off, but (current work load aside) it just didn't get me going.

I think the first reason is that I'm really looking forward to having working trains and trolleys going between the Shizuka and Soyokaze sections and all the fun between.  I have it worked out and having the space to do it will be amazing if and when it happens. The waiting has finally hit a pain point. Having the layout in a work space I only frequent two days a week these days doesn't really help a lot either.

I was listening to MODEL RAIL RADIO on the way home from work today and something struck me. I'm not running trains on this layout currently anyway. (Round and round makes me crazy) Why have it be a loop?


Again, I thought about this on the way home and won't be back at the office for another day, so I couldn't play with the idea physically. I had to do some searching via the internet. I found the KATO Unitram plate catalog and they had a serving suggestion involving a loop combined with my set. I figure I can try to use the plate portion of their suggestion or something like it to add some more interest to my Shizuka layout until the Bright And Shiny Future® comes where I can start my layout proper. :)

I think this might be the ticket to spice things up a bit. I can't wait to get to the office to try it out.

Oh...wait...yes I can. :)

Photos to follow.

<><>

Sunday, September 9, 2012

TOMIX #4018 building build out


 The build out of the Tomix building has started. At first, I was going to do a lot of detail work for the inside, but after taking a look at the darkness of the windows, I've decided to do simple stuff to create some shadows inside, but I'm not taking a lot of time with it.

With some outside light shining in through side windows, but no internal lights in place, there was no real need to do much more than shadow figures and foam core blocks to give the illusion of life within the building. Later, if I get the LED lights together for the "All together Now" layout of the future, I may rip this pass out and go for more detail.  Of course, who knows when that may be. :)

I've worked on the first two floors so far. I have a small lobby in place with a few folks waiting at the elevator, then I have a rather plain office above that. The thought behind that was that the office set to run the building and to take on other small tasks for local businesses that they had going.


The floors above will have a small art gallery and a few other stores of that nature - again, mostly cloaked in shadow and insinuation.

I've added some signs and mannequin figures to the front windows of the building as well.
 

The TOMIX products are pretty grand. They have just enough detail to make them interesting, but give enough space to add additional details and things to really make them your own if you so desire. There are some fantastic examples of this out there of people doing just that. The Tomytec and Tomix products are perfect building blocks for custom projects. I'll see how far this one goes for me.
 

 <><>

Soyokaze Lighting


Sorry about the blur

I've made an initial pass at the lighting in some of the Soyokaze buildings. Not bad seeing as I'm just using a Tomytec lighting system and not really using LEDs wired in. I just could not sort out the LED stuff at this time. It wasn't fun for me and I was rapidly getting frustrated with something that was supposed to be fun. :)


The next step over the next few days....or weeks...is to paint the insides of the buildings black and work out styrene blockers for the lights inside. Currently, it looks like there are giant, six foot tall lights in each building. heh   I'm also planning to experiment with paint on the styrene glow boxes to get that nice, orange glow I'm looking for. The "glow box" will just be simple styrene to take the light intensity down. I've seen it done and it works wonders.

I also plan to add figures, tables and other items into the store and restaurant fronts to make them look populated.

I'm glad I took a moment to drill the holes for the lights. It was well worth the effort. 

<><>

Sunday, September 2, 2012

Smooth-It Base and lighting

I have the next phases of Soyokaze moving forward and I'm trying to make the best of the Labor Day weekend now that the HORRIBLE month of August is gone gone gone! :)

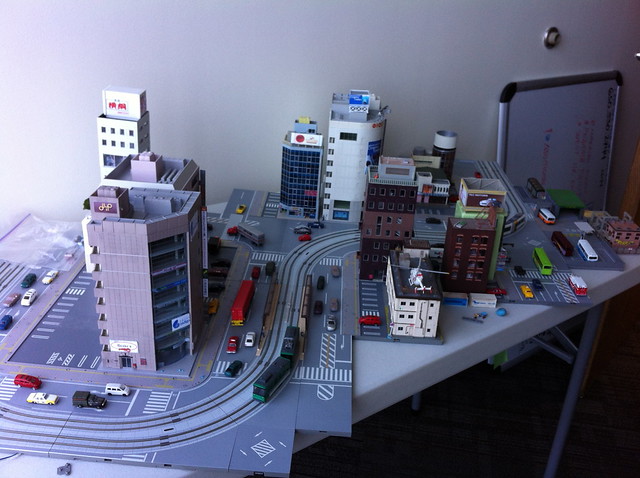
I saw a photo in a Japanese N Scale magazine that made me realize that I just wasn't going to be happy with a simple, painted "cement look" on the foam I'm using. I needed something more. I also wasn't going to be happy with buildings that didn't have light during the dusk hours. I could live without streetlights, but I really wanted to see the buildings with the soft, orange glow going. So, I grabbed my assistant and started in on the work to get there. :)

My Assistant  :)

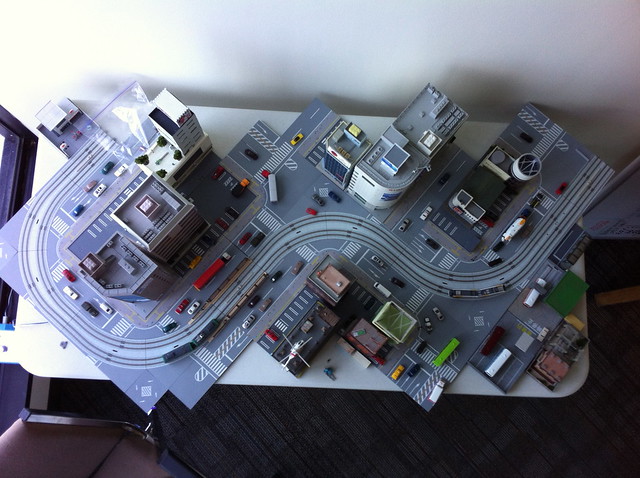
I started by laying the Smooth-It tape down around the area where the buildings were currently.

I popped the tops off my houses and marked where all of the light openings were. I love Tomytec for this reason - they have the lights in mind with their items. It was easy to push the drill bit through the foam to mark the spots. Then I had to pull all of the buildings off and put them aside. Setting them next to the Yamato seemed right. :)


Working with the Smooth-It stuff was MUCH easier this time. I was working with a larger area, so it just required a mixture of patience and speed to make sure I could get the area covered before it started to set. It's basically plaster, so the dry time is rather fast. The white spots are wads of tissue in the drill holes so the Smooth-It didn't flow into the holes.


I used the remaining Smooth-It to rework the vendor area and pond shoreline. Now the land doesn't run flatly up to the water. There is a raised area where the docks come off of. It's working really well. With some tuning, painting and details, it should be pretty cool. Much better than what was there before. I can't wait to get painting today!


The cool thing was the Smooth-It this round. It was almost dry, but still had a wetness to it and I started to run my finger over it. I noticed that I could sculpt out the rough spots seen in the image above so I don't need to sand it - thus avoiding the dust and madness that i had going when I did the road last time. It worked out really well and was fun to work with in this way. I smoothed out the land area, the area around the docks and the area on the hillside in the top of the shot. Painting and some scenic elements will really make this area pop nicely. The vendors will be very happy with their new location! heheheh

The next steps are painting and getting the lights placed. I need to work with the lights I have to give them a softer look with an orange hue. I'm using the Tomytec lights. I purchased them a year or so ago for this very purpose. Nice that they are finally coming into play.

I need to take them from white light to more orange, so I'll be researching optioned that won't burn the house down. :)

Speaking of, I have painting to do!

<><>