Showing posts with label office. Show all posts

Tuesday, September 13, 2016

Boxcar Building Kitbash

I made good on my threat, actually kitbashing up a building based on a shop space I saw in Maryland when I was back there on vacation.


I saw the original building (above) and thought it would make an interesting addition to the layout, so I put a plan in motion to bash up a version of it. Originally, I had planned on doing a direct version of this with three boxcars instead of containers, but I switched the plan when I got concerned about space.

The initial building I had purchased for the project was too small. ((SEE: Don't rush through your planning just to get something ordered online! hehehe)  Howevr, I had another little building that I wasn't happy with the placement of, so I thought I'd combine the two for this project.


The idea is that the boxcar is being used as additional storage. However, people had to b able to actually access the space. So I built an additional little walkway area on top of the main building.


The classic styrene build for a small patio area off the storage walkway.

I think I get a little sloppy with my building due to the fact that when all is said and done, you don't really see a lot in the final product in N scale two feet away. I really should work on that. 


All the parts were starting to come together nicely. I liked the composition, really. The use of the small Gashpon trolley piece I had worked out as well. As I worked on the building, I realized that I had NO idea what it was supposed to be! hhehehe  A museum? A railroad parts area? No idea. Comments and suggestions welcome!


Outside shots after the main build are always nice. The natural light can't be beat. I sat with this a while to make sure all the bases I wanted to hit were covered.

Before painting and details

After painting and details

So, purpose aside, I think I'm happy with this. It's interesting at least.  I might do another round of details after I figure out what the building's purpose might be. Until now, I plan to float it around as other areas of the layout get detailed out, then I'll find a final place for it after I figure out what it is.

I moved a building from the harbor area over to the factory area, so putting this building in the harbor area may make the most sense. I might loose the trolley aspct that way, however, so maybe not. It really does seem like a place people would visit.

I plan to finish off the edges of the foam board base before final placement. I think I'll do another round of painting on it as well.

Total cost for the building and boxcar I purchased for this project was about $11. Total time was about three or four hours to build it out, I think. And, now I hav something that is unique to my layout. I've noticed that there are a lot of Japanese layouts that have many of the same buildings on them, so it's nice to have a custom piece here and there to break things up a bit.


Wednesday, January 20, 2016

Forward progress

Well, I'm moving forward, but it's hard making this layout change take hold in my mind. I have this nagging thought that keeps popping into place.  

"But, you had a lot of it done already - this is a huge step backwards. You SURE you wanna do this?"

It's hard. :)

But, it's moving forward. Mr. Contractor showed up and started the initial door work - AKA, PHASE ONE - so I had to move some of my buildings off and away from Shizuka to avoid catastrophe striking. So, mentally, I've started. Buildings were taken away, boxed, and stored. Cars and poles and figures were moved off and away. It has begun!


I think what I'll do, since I have my office blown up anyway, is just camp where I am for a week or so, break down the Kiwamura side of things once the doors are in place, get the back office sorted, then move right into the back space when I end up rebuilding my office. Seems to make more sense than moving back, then moving again shortly after.

It's just going to be a wild mess for a while while I tear things apart and put them back together. I have to keep my eye on the goal - having all the layout in one room.


Some folks might be visiting from Australia in the summer months, so I'd like to have things somewhat together by then. Benchwork and track at least. And, I love the fact that when I mentioned the cost playing a factor in all this, my wife said, "It's not going to be THAT much money, right? We can make it work. It's not that big a deal." So cool that she's so supportive!

I think the most difficult part is going to be the dismantling of Kiwamura. It was just starting to come together. Again, it's going to be far more functional in the new location. That's going to be exciting. I just need to avoid analysis paralysis when it comes to the track and the overall setup. While I do want things to be done properly and cleanly, I don't want fear to freeze me up.

ONWARD!
<><>

Monday, January 18, 2016

More layout change ideas (video)


Crazy little sketch :)

Another quick iPhone video with some additional thoughts on the layout change up. As I work through the details, I see various ways where I can incorporate some of the things I want to get in place without a large output of cash. I also want to make sure I'm taking the time I need to really get things working properly.

The action plan as it stands now is:

• Replace the doors on my office - This should be happening this week...contractor and rain willing. :)

• Tear out the track on Kiwamura - This is going to be really difficult. :(  I'm not looking forward to this series of steps because it's a bit of a step backwards.

• Pack up all the Kiwamura section items (buildings, etc)

• Remove Kiwamura scenery - Trying to save as much as I can to use it elsewhere later.

• Disassemble Kiwamura and stack out wood- REALLY tough one.  

• Move all office elements to back office area and re-set office space

• Start in on new benchwork

If I can get in some work days (I have a birthday coming up and that would be an idea gift! :) ) I can get the first few items done and my office set up in the back area. That would be a fantastic start. I think having the new doors and more organized work space will be fantastic - a huge plus for moving the layout and changing it up.

Still not sure if I'll have the subway section. I'm not sure I want to get into a helix situation. Maybe a very long level change of some type - not sure. I'm not stuck to the idea of a subway of I can get some of the other items in place. Running some Shinkansen around would be fun!

Thursday, July 9, 2015

Throwback Thursday - Jan 2013 layout

I was looking through some old photos of my layout and thought I'd toss them up for a little flashback.


The layout was more of a module set up on my dressers. We lived in San Francisco and the apartment was really small. Using the tops of the dressers really worked out - space that was already taken and that wasn't really being used for much.

The small size made it easy to add various details and interactions. I plan on adding many details like these onto the new setup.


OLD SOYOKAZE SECTION


I liked the layers on these modules. The new extension will have more levels like these. I might even be able to add some additional elevation elements into the Soyokaze section on the current layout. 


The seawall and dock areas were also fun on the old module. I'm glad I took a ton of photos of this section! :)


Again, I liked the elevation of the old Soyokaze section. I really made a mistake not going for something similar in the new Soyokaze arrangement. Looking at these raised areas with roads and walkways makes me want to lift the whole of the current Soyokaze section up.  That might have to happen.


OLD SHIZUKA SECTION
Old Shizuka was pretty busy. Again, the small size helped, but a lot of why the current Shizuka section isn't so busy yet is just due to me altering and re-arranging so many times. Once I get things finalized, I'll go back to making Shizuka a busy spot with lots of people yet again.


Little internal details really brought a lot of these buildings to life. Adding in lights later will add even more coolness. 

WAY better with people and furniture inside! :)
 Busy streets!


Again, internal details are important to me. Even shadow silhouettes of people in windows helps to make things seem occupied and busy.


Cheers!
<><>

Friday, May 17, 2013

Shizuka Building Build Out: Interiors


Well, the interior of this building proved to be a little challenging. Again, I wish I took more time with it, but I really needed to cram some hobby time in and get something complete. This is my hobby life at the moment. This project was going to drag on for months if I didn't push through. And, in the long run, it was a lot of fun.

The hardest part about working with this Kato building was dealing with these internal floors and actually getting them OUT of the building. It was rather interesting - they had a light bar rolling up through the center of the floors. To get them out, you pull the light bar down after fighting with the clips at the base of the building. :) The floors are in tight and come out like pulling the cork from a bottle of wine. I knew the real challenge was going to be getting them back in and I was right.

I numbered the floors as I took them out of the building (...though later I'd blow off the numbering entirely...) and thought about what I'd like to have on each. Offices were a must, but my 2.5 year old wanted a floor for herself as well. heh


I thought that another way around having to fill each floor 100% was to do some offices in the front of the floor. This worked really well. The offices were in the front and only a small portion of the floor was visible through the door. I was able to pop some images on the back wall and it was all good.


Making desks was fun. Info on that can be found in my other update earlier this month. Again, more time and more attention to the process would give me better results. I have that as a goal for later this year - taking more time and effort with these projects. That being said, the desks are messy, but barely visible inside the building, so they are working well.


I used some of the more rough looking figures inside, saving my new, beautiful Kato and Tomytec figures for some other "hero" locations later.

And the best part about this project was the final look of the building. To quote my wife, "It looks like there's actually stuff going on in there, not just some hollow shell."  Much better than floor after empty floor. Once I get lighting handled, it will take another step up as well.

I believe that I'm getting the balance of detail and interest for these internal scenes. I want to show that things are going on in the building, but the detail that I put in on earlier revs just was not visible without lighting inside the buildings. for this first round offering, I've gone with enough detail to make things active without making tings too built out. It's almost like building stages for plays - you want there to be enough information to understand what's going on, but you don't need "movie" levels of details. Especially in N scale. :) I've also left many of the internal details styrene white so that they show up better in the darker building interiors.

Putting these floors back in proved to be the biggest pain. The lightbar spine of the buildings was horrid. Taking them out was easy, but putting them back with the bar in place was a royal pain. I ended up leaving the lightbar out. I'm not lighting them right now anyway. I also left off a floor that didn't have much going on in it because when I built out the lobby section, I mis-measured and the horse in it was too high to support the bottom floor. I think it's better with a little more lobby headroom anyway. It gives it more space.


You can find more shots here:
http://www.flickr.com/photos/malcojojo/sets/72157633480860536/


My daughter's hand in the shot. :)


A very active space.


My next Shizuka Building Project will be another kitbash, giving me one of the largest buildings in Shizuka!

Sunday, September 9, 2012

TOMIX #4018 building build out


 The build out of the Tomix building has started. At first, I was going to do a lot of detail work for the inside, but after taking a look at the darkness of the windows, I've decided to do simple stuff to create some shadows inside, but I'm not taking a lot of time with it.
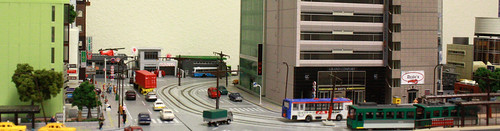
With some outside light shining in through side windows, but no internal lights in place, there was no real need to do much more than shadow figures and foam core blocks to give the illusion of life within the building. Later, if I get the LED lights together for the "All together Now" layout of the future, I may rip this pass out and go for more detail.  Of course, who knows when that may be. :)

I've worked on the first two floors so far. I have a small lobby in place with a few folks waiting at the elevator, then I have a rather plain office above that. The thought behind that was that the office set to run the building and to take on other small tasks for local businesses that they had going.
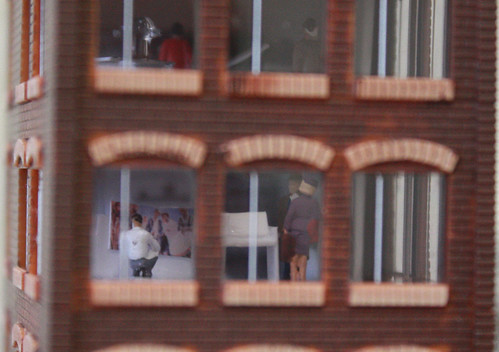
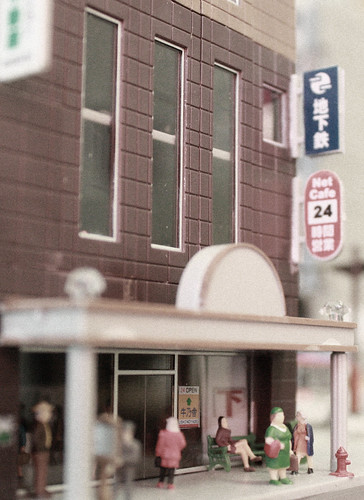

The floors above will have a small art gallery and a few other stores of that nature - again, mostly cloaked in shadow and insinuation.

I've added some signs and mannequin figures to the front windows of the building as well.
 

The TOMIX products are pretty grand. They have just enough detail to make them interesting, but give enough space to add additional details and things to really make them your own if you so desire. There are some fantastic examples of this out there of people doing just that. The Tomytec and Tomix products are perfect building blocks for custom projects. I'll see how far this one goes for me.
 

 <><>

Wednesday, August 29, 2012

The return of the Shizuka Layout!

I'm VERY excited!
We've moved into our new office and - due to a sad departure of a co-worker - I've gotten my office and my spot for SHIZUKA to be reset! I'll probably start pulling it out of boxes next week.

While I'd love to do something more permanent, (SEE: Bright and Shining Future with space for a layout at home) I'm still going to keep Shizuka fluid and mobile, putting people in with clear bases and signage in with blue tack or clear bases as well. Breaking the set down during the office move was much easier since I was able to just pull everything off.

It's going to be a lot of fun resetting things.

For those playing at home, this was the old Shizuka layout in my old office.


More photos here:  http://www.flickr.com/photos/malcojojo/sets/72157628630757331/

≤≥≤≥

Thursday, February 9, 2012

Additional Work Layout Photos

I've gone through and taken some more photos of my work layout. We just found out we have to MOVE at the end of March, so the layout will have to be packed up for moving, sadly.
Even more crazy making is having to make sure I get another office space! I need to have a space where I can re-set the ole work layout or I'll be really upset. :)


More photos up on FLICKR: http://www.flickr.com/photos/malcojojo/sets/72157628630757331/


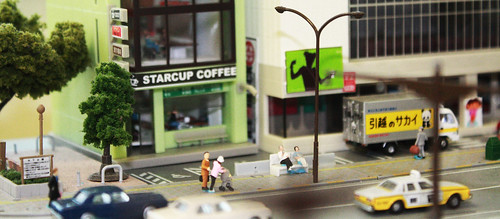
The STARCUP COFFEE spot! :)
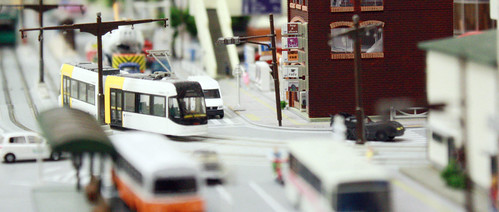
Morning tram out to Old Town


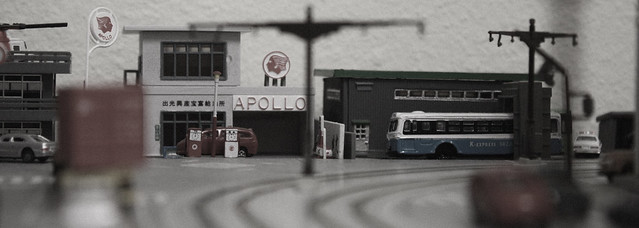
Apollo Gas - $3.00/gallon when paying with cash!